Files to have on hand: CA Bundle Certificate
These can be obtained from us through your account. If you don't have access to them you may download them from the CA Bundle Certificate section of our Downloads area.
Root and Intermediate Certificate installation via MMC
1. Open up the Microsoft Management Console (MMC)
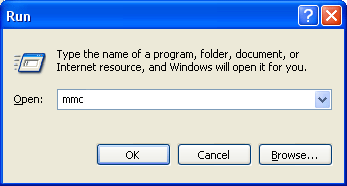
Start -> Run -> Type "mmc" (without quotes) and Click 'OK' or hit Enter on your keyboard.
2. Open 'Add/Remove Snap-in' Window
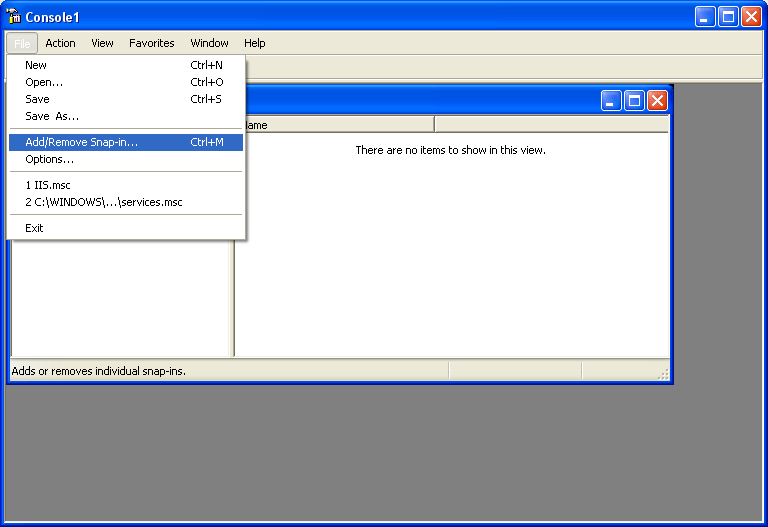
File -> Add/Remove Snap-in
3. Add the Certificates Snap-in
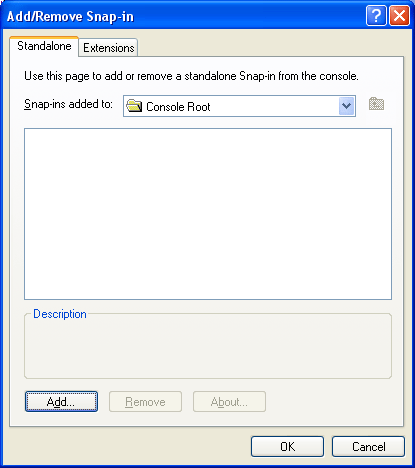
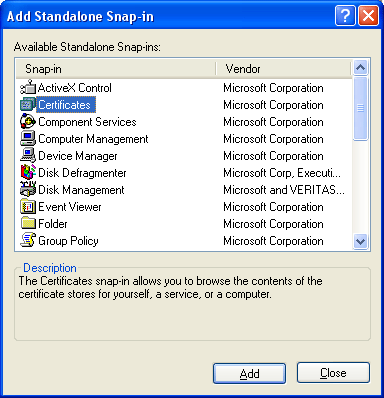
Click 'Add' then double-click 'Certificates'
4. Select 'Computer Account' and click 'Next'
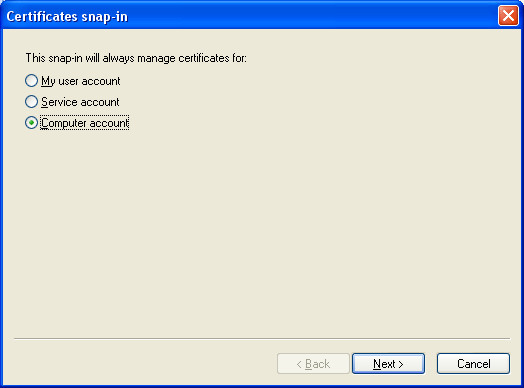
Note: This step is very important. It must be the 'Computer Account' and no other account
5. Select 'Local Computer' and click 'Finish'

6. Close the 'Add Standalone Snap-in' window and click 'OK' in the 'Add/Remove Snap-in' Window.
7. Will now be returned to the MMC.
Install/Import the CA Bundle Certificate
1. Download the appropiate CA Bundle for your domain.
2. Import the CA Bundle

Right-click on 'Trusted Root Certification Authorities', select 'All Tasks', then select 'Import'.
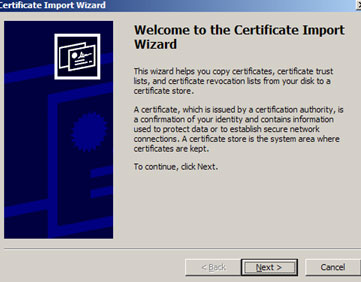
Click 'Next'.
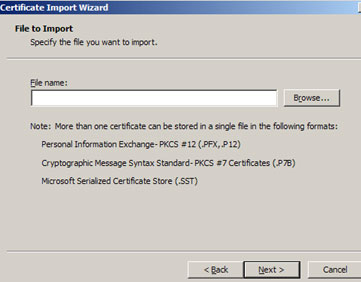
Locate the CA Bundle Certificate and click Next.
When the wizard is completed, click Finish.
* Intermediate(s)
3. Import CA Bundle Certificate
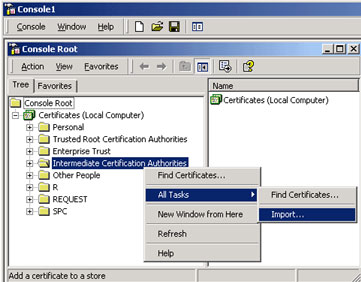
The process is the exact same except the area of interest is 'Intermediate Certification Authorities' instead of 'Trust Root Certificate Authorities' and the file(s) that are to be imported are the remaining files outside of your domain certificate.
4. Restart Website through IIS.
Note: If you're page is still showing certificate errors, one may have to stop and start the website or even the IIS Service itself. If this fails one may have to restart the server itself. Do keep in mind that rebooting the server is to be used as a last resort. Please contact support if you require further assistance.
Related Articles
* Which is Root? Which is Intermediate?
